Elevate P2P QR Quick Setup
With P2P QR connection there is no need to set any ports, worry whether your uPnP is enabled within your router, do any port forwarding within your router or setup a DDNS name.
-
Log into your DVR/NVR’s menu (default: admin/1234567u)
-
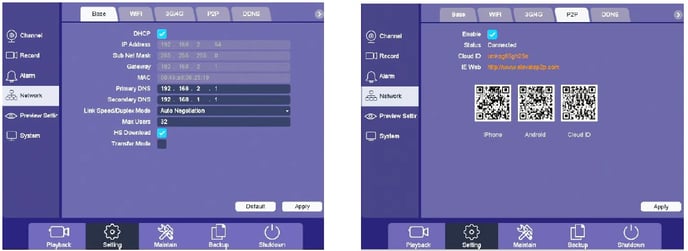
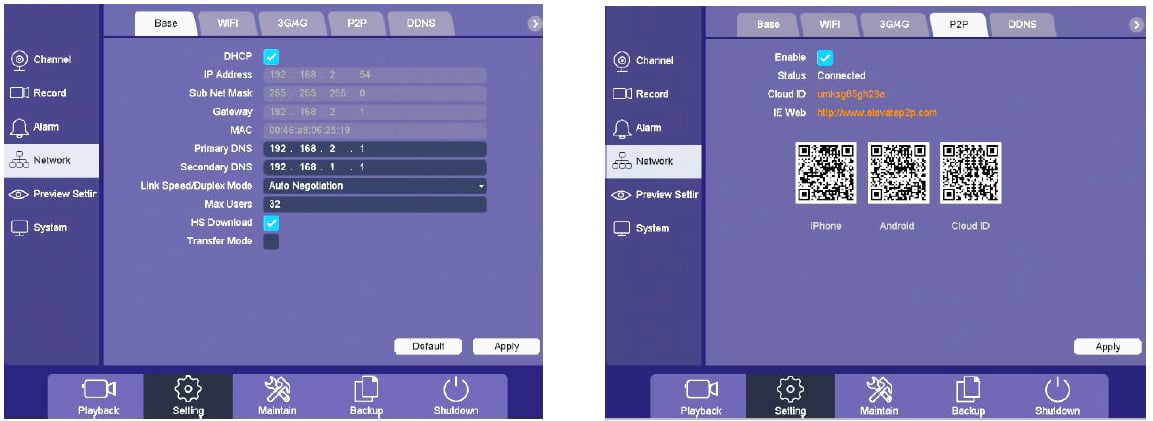
Right click your mouse and choose Menu/Network/Base
-
Under Set menu, at bottom, then Network on left and Base, across the top, DHCP should be enabled by default, make sure it’s
still checked off.
*Click on the images below to view in full screen.*
-
Under the P2P menu (Menu/Set/Network/P2P), P2P should be enabled by default, make sure it is still checked off.
-
Status should read as “Connected”, if you have a network cable connected.
-
Write down or take a picture of your CLOUD ID
-
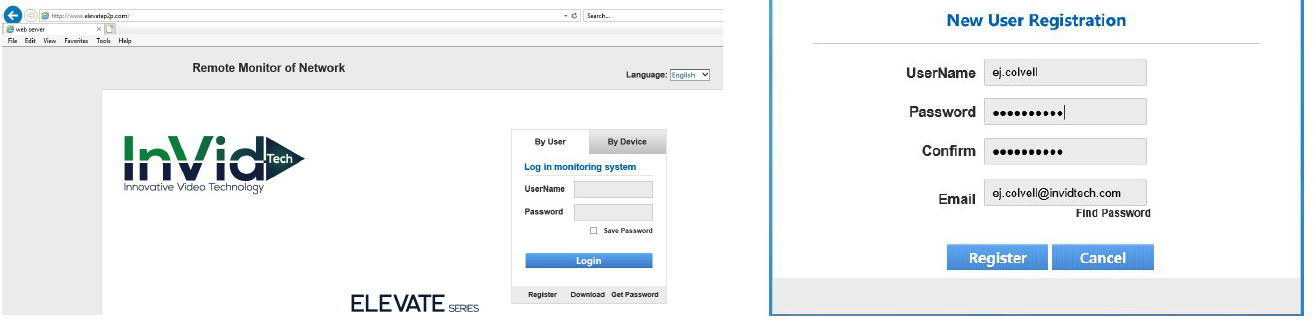
Next, using a PC log into www.elevatep2p.com

-
Click “Register” to make a new account
-
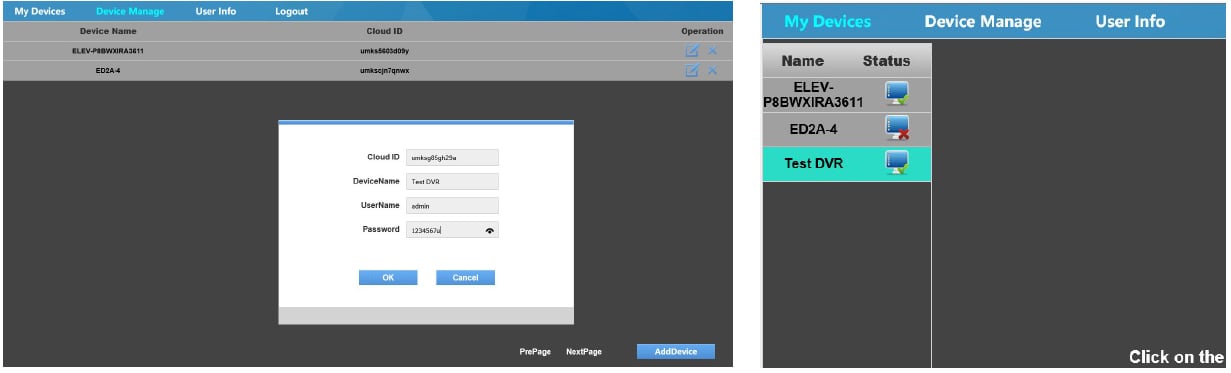
Now log into your account and click on DEVICE MANAGE, across the top
-
Hit ADD DEVICE in the bottom right hand corner
-
Enter in your CLOUD ID, the Device Name (any nickname you prefer), and then the User Name and Password of the DVR/NVR
(default is admin/1234567u)

-
Hit OK to add the device, after a couple of seconds you will get a Device add success message
-
Go back to My Devices across the top and you will see your device on the left with a “green check” indicating it is online