PAR-P4PTZXIR25NH-AI, PAR-P2PTZXIR25-AI
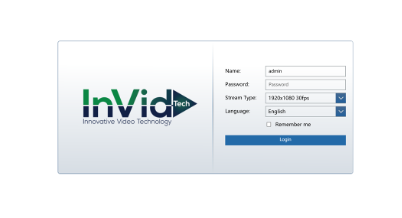
1A – From the Camera: Log into the camera directly using the IP of the camera and being on the same network as the camera, (you can locate the IP in the recorder or with the IP tool 2.0 from our website)
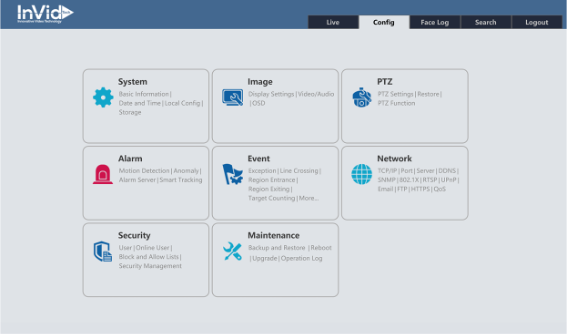
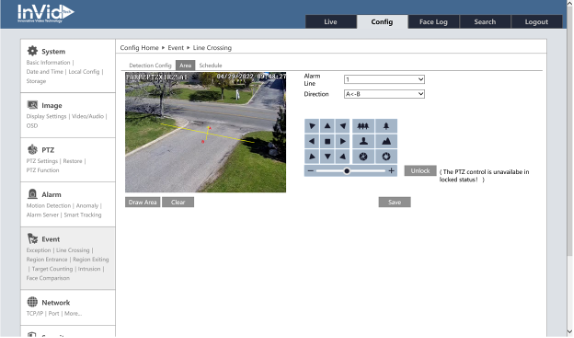
Once logged in click on “Config” across the top then chose Event/Line Crossing, Intrusion, Region Entrance or Exit. We will use Line Crossing as the example here.
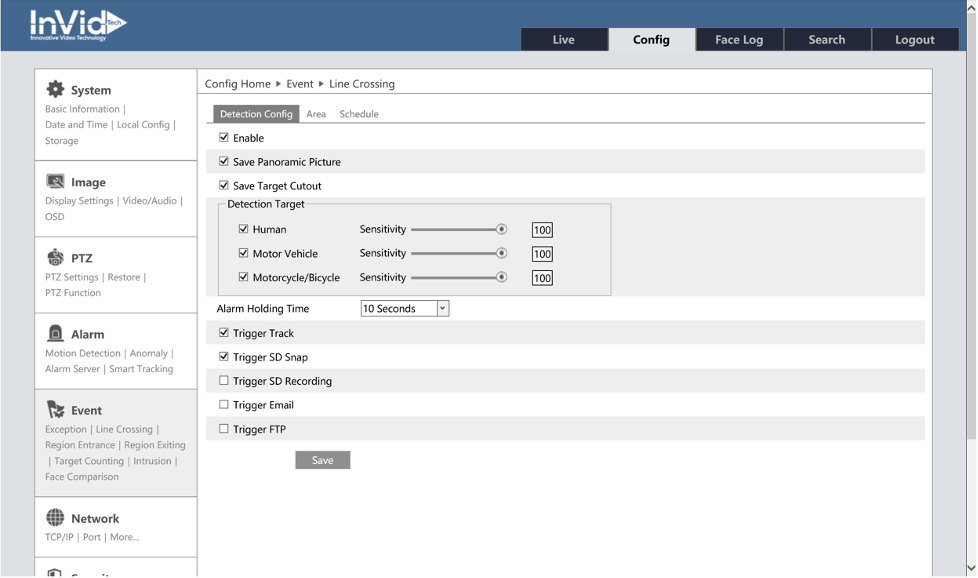
2A- Once in Event/Line Crossing, you want to “Enable” and choose what options you want, (you want to make sure at least one option is chosen under “Detection Target”). Make sure to enable “Trigger Track” and hit “Save” to complete.
3A- Now a line in the view needs to set up, click on “Area” tab, click on “Draw Area” then draw the line you would like to start the tracking, on the right you have the options move and zoom the PTZ and choose what direction you would like to monitor. You can have up to four lines set, and make sure to set the directions for each line.
**NOTE: You must LOCK the PTZ controls to enable/start the trigger tracking process, or it will not track**
When complete click on “Save.”
4A. By default, the PTZ is set for “PTZ Auto Tracking Priority” which means you will not be able to manually control the PTZ once it is locked/enabled to trigger track. In this case a “Home Position” is not required. If manual control is desired, you can change this by going to Config/Alarm/Smart Tracking, then select “Manual PTZ Control Priority.”
**NOTE: in Manual PTZ Control Priority you MUST create a Home Position**
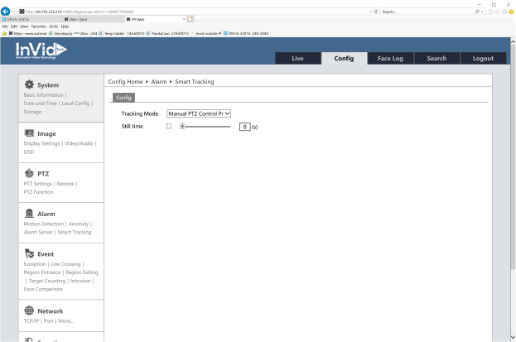
PTZ Tracking Priority: if this mode is selected, in smart tracking mode, you cannot control PTZ by clicking the buttons on the PTZ control panel in the live view interface. (this will return to the area when line is set up)
Manual PTZ Control Priority: if this mode is selected, in smart tracking mode, you can control PTZ by clicking the buttons on the PTZ control panel in the live view interface and then the camera will immediately stop the tracking action. After you finish controlling PTZ for 5 seconds, the PTZ camera will return to the start tracking position and wait for the object to appear. (Highly recommended to set home position due to the unit will not return to the line when movement stops)
Still time: If it is enabled and the time is set, when the target stops or hides behind an obstacle, or the target tracking is complete and there is no target appearing in the detection area during the set time, the PTZ camera will return to the tracking start position. Of course, during this time, if there are targets moving, the PTZ will keep on tracking.
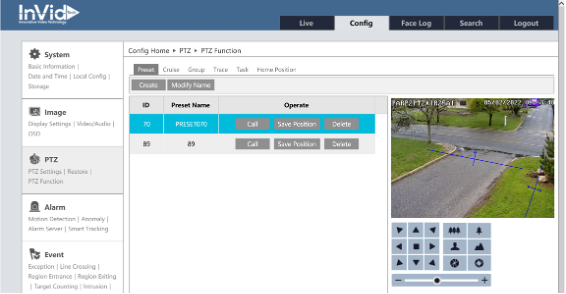
5A – If a Home Position is needed to be setup, please follow these next steps.
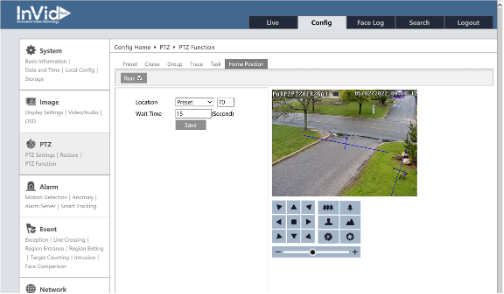
Go to Config/PTZ/PTZ Function and start with setting a PRESET. NOTE: for Home Position, the preset number must be between 70-80. Use PTZ controls to set position and then hit “Create.” Then click on “Home Position,” set the Location to “Preset” and input the Preset number (70). The “wait time” is how long after manual movement the PTZ will go back to its Home Position, set, then make sure to check off the “RUN” button, then “Save.”
Paramont PTZ -AI Auto-Tracking Setup from NVR
PAR-P4PTZXIR25NH-AI, PAR-P2PTZXIR25-AI
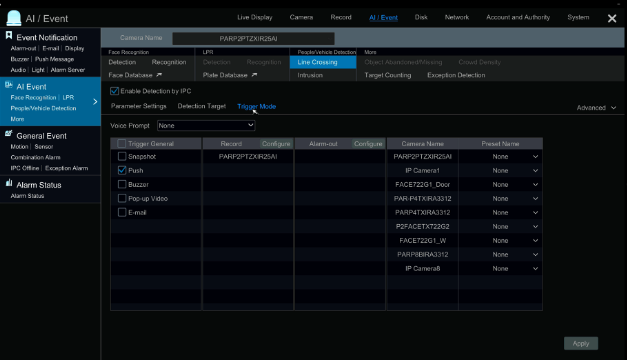
1B – From an Paramont Recorder: Add the camera to the recorder, then from the recorder head to Start/Settings/AI Event. Choose the camera from the drop down next to “Camera Name” then choose “Line Crossing” and click a check mark next to the “Enable Detection by IPC.” Choose “Draw line” and draw a line in the image that you would like to detect (you can set up to four lines), make sure to set your direction,
**NOTE: You must LOCK the PTZ controls and select “Trigger Track” to enable/start the trigger tracking process, or it will not track**
When complete click on “Apply.”
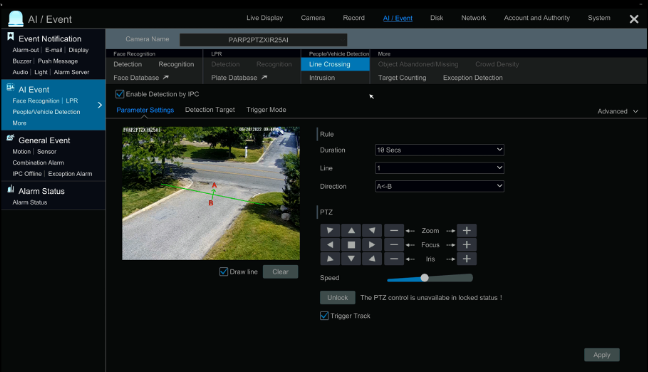
**Note: From the NVR you cannot set a Home Position, you also cannot change the PTZ Priority, so it will be “PTZ Auto Tracking Priority” by default (no manual PTZ Controls). If you desire manual control as well, you will need to log into the cameras OSD directly to set, see above.
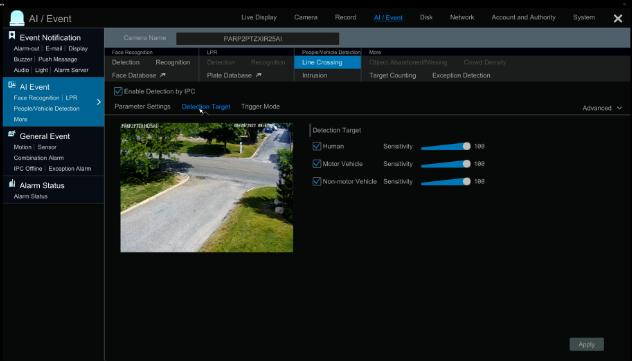
2B – Click on “Detection Target” and choose what you would like to to detect, also can adjust senitivity for each as well click on “Apply” when complete.
3B – optional: you can also click on “Trigger Mode” to choose other action options when the line it activated, click on “Apply” when complete.