
With P2P QR connection there is no need to set any ports, worry whether your uPnP is enabled within your router, do any port forwarding within your router or setup a DDNS name.
- Log into your DVR/NVR’s menu (default: admin/1234567u)
- Right click your mouse and choose Menu/Network/Base
- Under Set menu, at bottom, then Network on left and Base, across the top, DHCP should be enabled by default, make sure it’s still checked off.
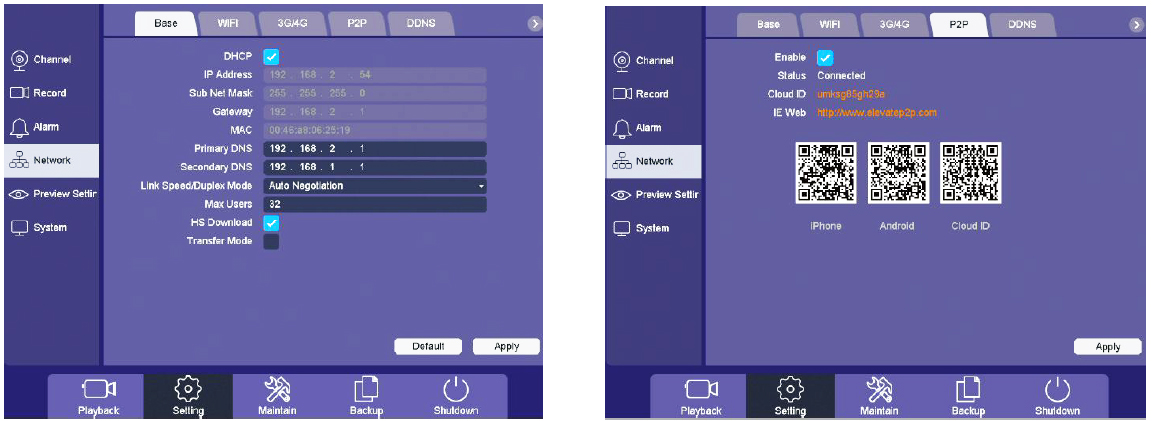
- Under the P2Pmenu (Menu/Set/Network/P2P), P2P should be enabled by default, make sure it is still checked off.
- Status should read as “Connected”, if you have a network cable connected.
- Write down or take a picture of your CLOUD ID
- Next, using a PC log in here
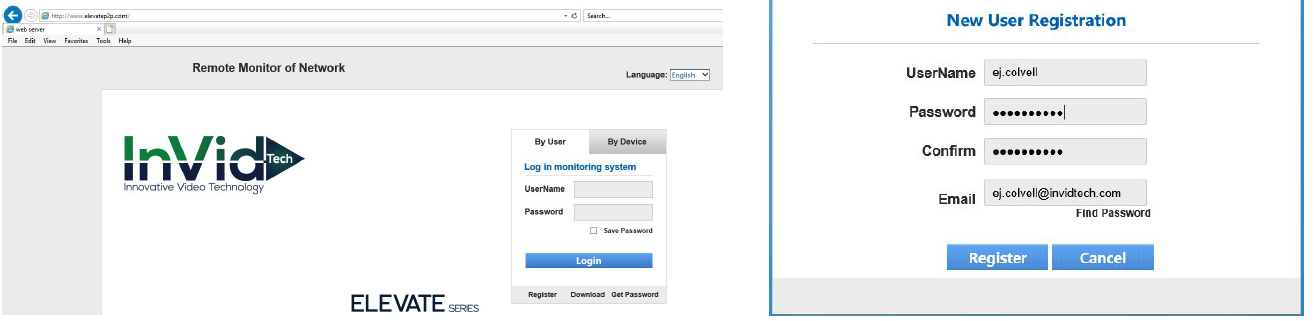
- Click “Register” to make a new account
- Now log into your account and click on DEVICE MANAGE, across the top
- Hit ADD DEVICE in the bottom right hand corner
- Enter in your CLOUD ID, the Device Name (any nickname you prefer), and then the User Name and Password of the DVR/NVR (default is admin/1234567u)
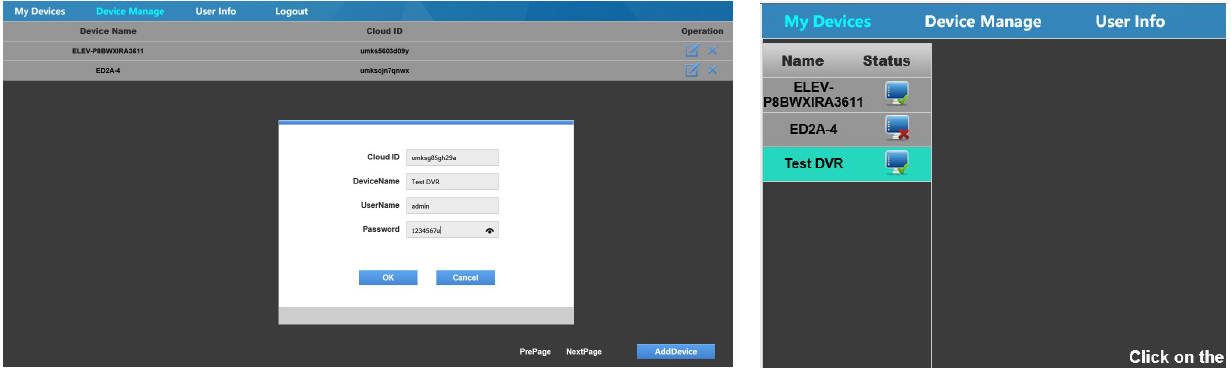
- Hit OK to add the device, after a couple of seconds you will get a Device add success message
- Go back to My Devices across the top and you will see your device on the left with a “green check” indicating it is online
Viewing your Elevate Device Online or from Mobile App
Viewing from your Web Browser (Internet Explorer):
- Once logged into the server, here, double click on the device to the left. It will open a new tab and bring you right into the browser.
Please note, if images do not pull up, please close browser, right click on Internet Explorer and choose “Run as Administrator”. Log back into he server then double click device to open and you will then be able to view your cameras.
- You may be prompted to download or Allow the plugin, in some cases you may need to “Refresh” or re-start the browser.
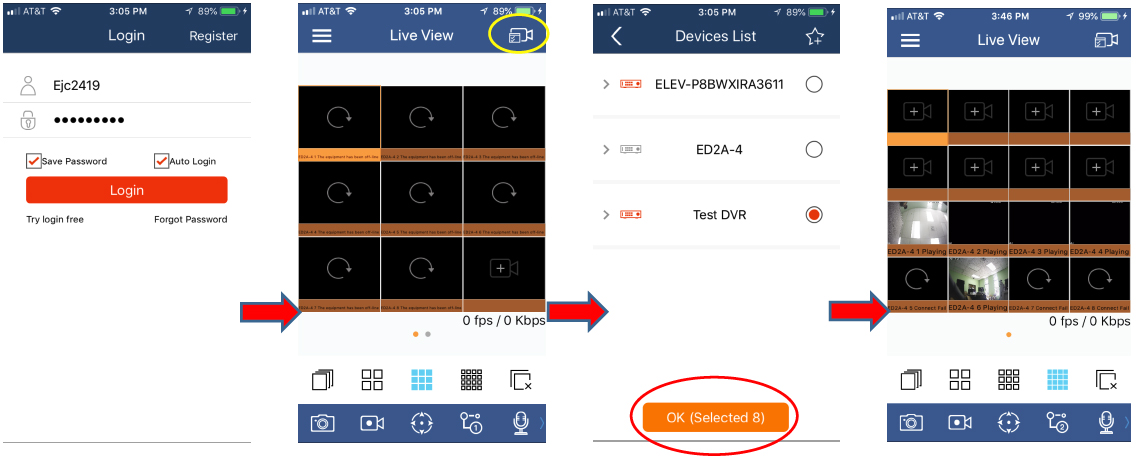
Viewing from your InVid Elevate mobile app:
- Open your mobile app and sign in with the User Name and Password you created here
- Hit the camera icon in the top right, which will open your “Device List”
- Check off the device you’d like to view and hit “OK (Selected X)”
- It will then bring you to the “Live View” screen and load the selected devices
Not connected? Here are some things to check
- Make sure the physical connection between DVR/NVR and switch/router is made, and the cable is good (see if you’re getting the green/amber link light on LAN port)
- Sometimes the P2P will show as “Not Connected”, try rebooting your modem/router and DVR/NVR to see if it comes back as “Connected”. Also, give it about 1-2 minutes to make a connection if cable is plugged in after the DVR/NVR is booted up. If not, see #3
- DHCP may be turned Off within your router, you may need to disable in DVR/NVR and manually input your IP Address, Subnet Mask, Default Gateway and your DNS Servers
- Sometimes though the DNS is pulling the router IP, which can cause the device not to connect. You can change the Primary and Secondary to Google’s addresses (8.8.8.8 & 8.8.4.4)
- Can you connect to the device via the LAN IP, whether it’s the DHCP address or the address you manually gave it (because DHCP was disabled) via the Internet Explorer to ensure it has network connectivity
- Was the DHCP/P2P definitely “enable” and saved, check back (Menu/Set-at bottom/Network/Base-across top & P2P-across top)
- If all else fails, you can always reach out to the InVid Tech technical Support Team